How to Make a Baby Quilt From Baby Clothes
It's always difficult to know what to exercise with precious babe wearing apparel once your babe becomes a total-blown kid. While most of them can be donated or passed on to other families, sometimes there are a few that are simply as well special. These are the baby clothes that instantly conjure up a sharp retentivity, a smell, or a small but memorable moment from those fleeting baby days. But, without whatever real plan for what to do with them it can feel a little featherbrained. Rather than let them sit down in a bag in your closet, I suggest you stitch yourself a infant clothes quilt! Let me show yous how I have made mine then you lot can make ane yourself!
I accept made well-nigh half a dozen of these babe dress quilts and I actually love the results every time. I fabricated one each for my boys and a handful of others for families I am close with. Every time I make a baby clothes quilt, I go a bit emotional. Often my friends get emotional, likewise. It is not lost on me that I am being trusted with something really precious. They can be a chip of work, however, then I suggest setting aside some time.
+ Begin past sorting through your babe dress and selecting 30 or so items.
+ Roughly cutting upwardly the baby clothes you selecting to isolate the designs or patterns yous like the most. These will be a multifariousness of shapes and uneven cuts. Don't worry we are going to clean information technology all upwardly. Continue some of the plain backs of t-shirts because you may demand them for design purposes later on.

+ Next, with equally many pieces as possible, cut your textile into 6″ squares. Not everything will work when cut down this minor only simply exercise as much equally possible. We will incorporate the larger pieces into the pattern when nosotros become to that part.
+ For larger pieces, Just try to cut them down so that they have clean-cut and even sides.
+ Adding Interfacing: Cutting up the same number of squares of lightweight interfacing as the number of jersey knit clothing squares you have. I suggest this product from Fairfield. (Note: I am a rep for Fairfield but I honestly love their interfacing. That said, any lightweight interfacing will do the fob.) Additionally, cut interacing pieces to friction match your odd-shaped habiliment fabricated of jersey knit.
+ Advisedly iron the interfacing to the back of ALL pieces made of jersey knit, t-shirt material. This will help your sewing task IMMENSELY. By stabilizing your jersey knit pieces all of your material volition essential carry similar woven cloth. Trust me, don't skip this footstep, it volition relieve you lots of headaches later on! If your fabric has a printed pattern on it, be certain to place a pressing fabric over it while you iron so the epitome doesn't melt.
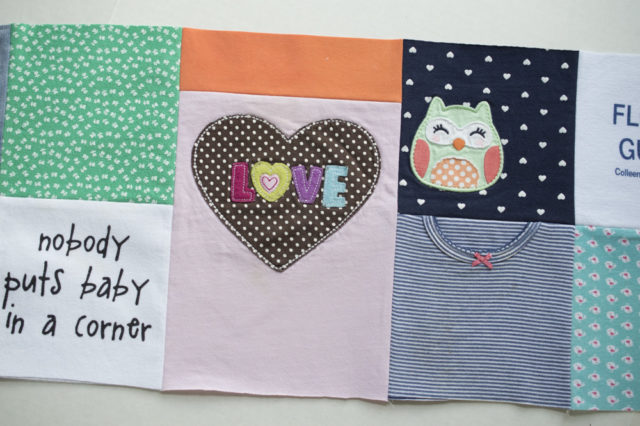
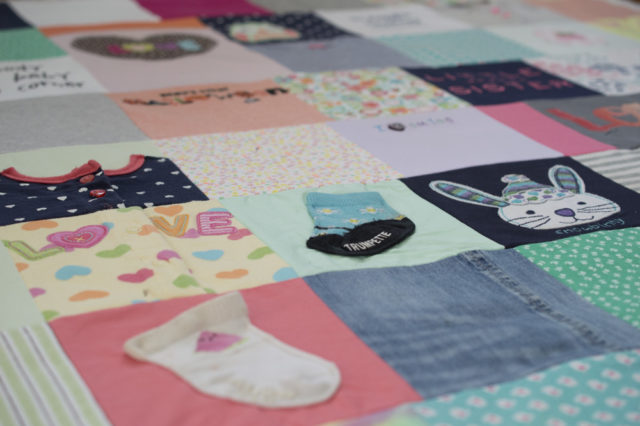
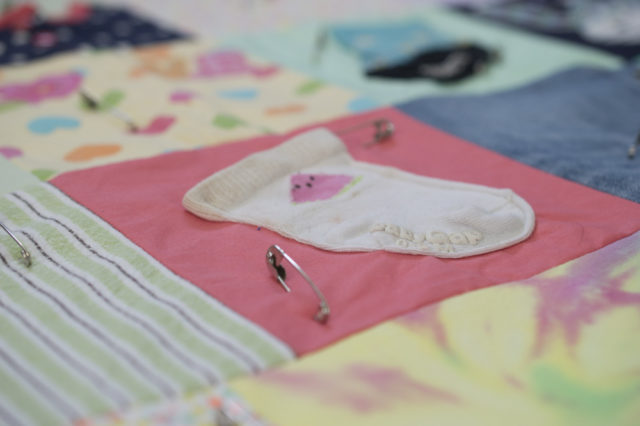
+ Next, incorporate a few special items such as socks, buttons, hoods or tassels. To do this, cutting a piece of woven fabric in a vi″ square and just simply stitch the detail into the heart.

Continue to improvise around those special items. These are really the details that make the quilt special.
For example, For one of my quilts, I wanted to comprise the hole worn into a pair of jeans just didn't desire the quilt batting to poke through and so I stitched the jeans cloth over a piece of plain, pink fabric.

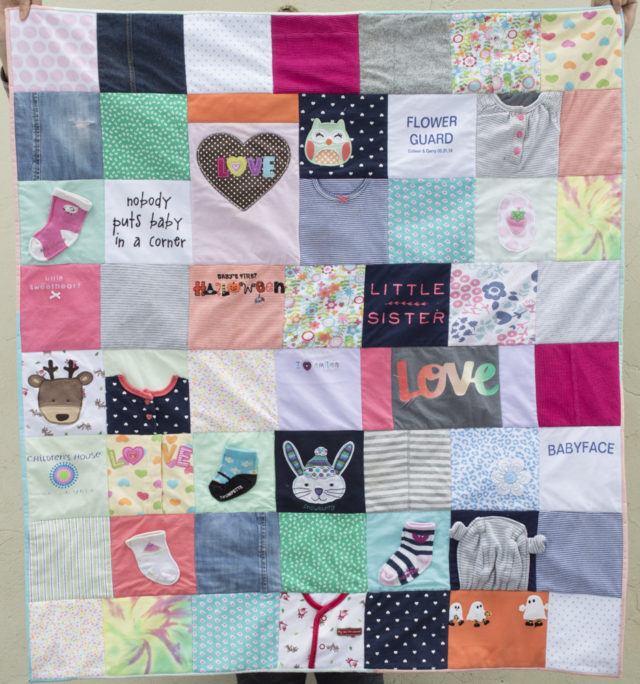
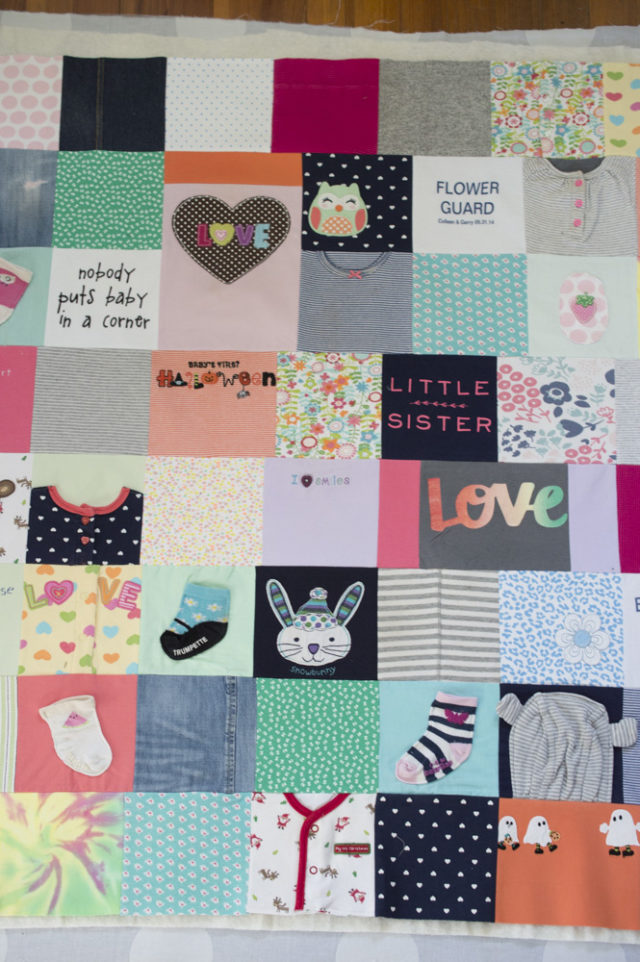
+ Once y'all accept all of your jersey fabric interfaced, your special pieces created and your odd pieces cut cleanly you are set to create the blueprint. To practise this, determine on a general size. Probably around 40″ across and l″ high. Translated into our fabric cuts, this is vii fabric squares across and eight textile squares down.
+ Layout and design, for me, is a very improvised procedure. You may want to lay everything out precisely beforehand but I start by creating rows across that accommodate my odd-shaped pieces.. more often than not making sure that I am creating what approximates 7 material squares across.
+ Atomic number 26 the seams after every stitch to be sure everything lays flat.
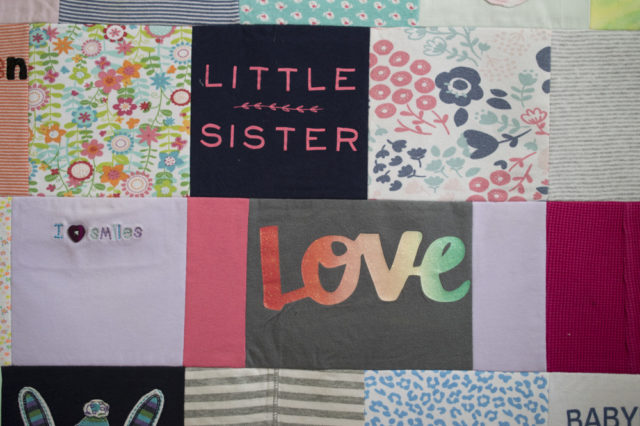
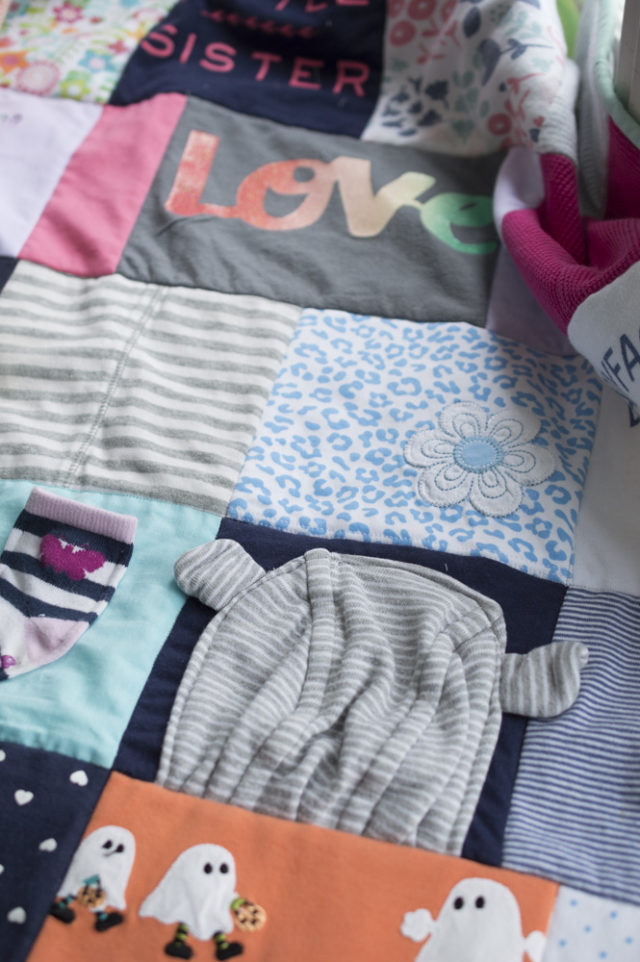
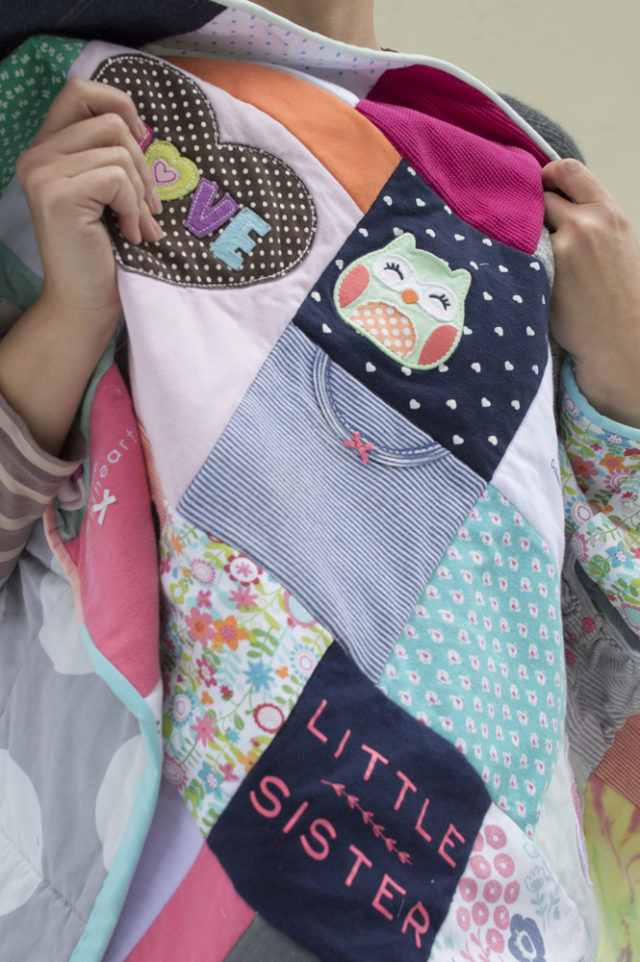
+ Keep to create rows in this same way. Sometimes I am able to work in a bit of bulletin that defines the kid. Such as in this quilt when "Fiddling Sister Love" looked so proficient together. Notice that I added bits of plain t-shirt to the sides of "Beloved" so that it fit under two standard-sized squares? This is the kind of improvising that this stage of the process requires. If you need to add an extra strip here and in that location, don't worry. This isn't about being perfect, information technology'south near saving a retention.
+ One time y'all have completely pieced together and designed your quilt top, it'south time to make the quilt.
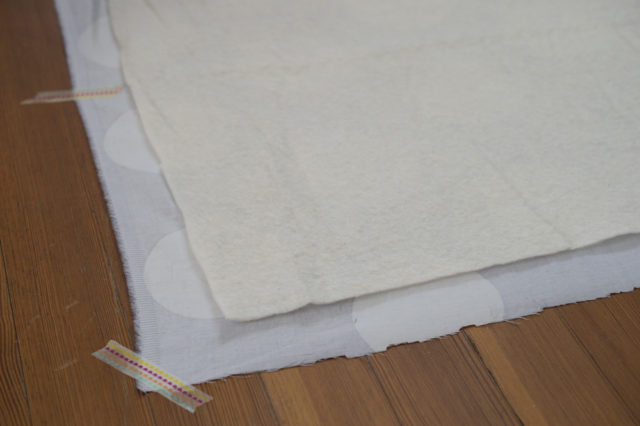
+ Tape downward your backing cloth, face down, and identify quilt batting on top, I recommend this cotton wool batting from Fairfield*, which is 100% cotton fiber and super soft and washable. If you prefer a polyester alloy that will piece of work only fine, too, merely I exercise dear the all natural materials. Your backing cloth and quilt batting should be a bit bigger than your quilt top.
 + Identify the completed quilt top on the batting.
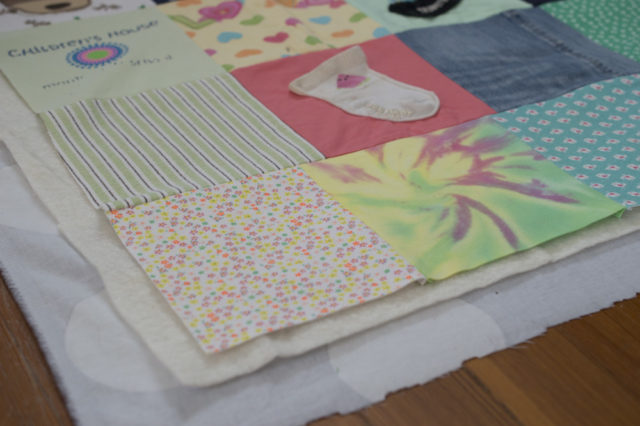
+ Pin through all three layers to agree it in place. I aim for 2 pins per quilt foursquare to exist certain it is secure.
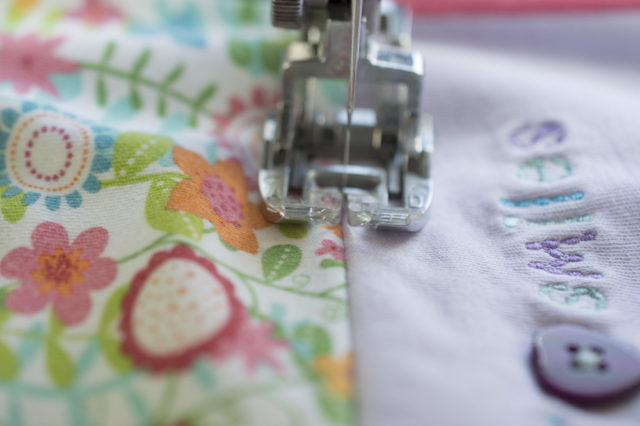
+ Sew by stitching in the ditch on all seams of the quilt. If y'all have a walking foot, you will discover it incredibly useful for this sewing.
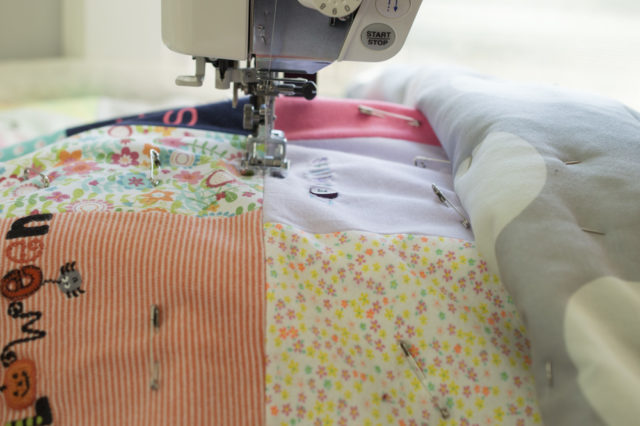 (If y'all aren't familiar with stitching in the ditch, it's but a fancy way of saying that you want to run up in-betwixt the seams as much as possible. )
+ Once you take sewn within the seams besides as you lot can, you can sew one last stitch all along the edge of the quilt and cutting off any excess batting and backing fabric.
+ Utilize a quilt bounden in your preferred method. This is my favorite fashion to practise a quilt bounden just follow this tutorial if y'all prefer hand-stitching.
You are done! Enjoy the beauty you created!

The best part is that while these quilts capture pieces from the fleeting babe days, it's also possible to see more of the futurity in watching kids react to seeing them for the get-go fourth dimension. My own kids giggled, pretended to autumn asleep, and jumped upward to point at things they recognized in the quilt and they suddenly looked so big. The days of onesies and swaddling blankets seem and so far backside while SO MANY astonishing and incredible moments seem just upward ahead.


Note: As I mentioned, I work with Fairfield and am an affiliate for them. They did not, even so, compensate me for this mail and my opinion and recommendations about their products is my own. If you purchase their batting afterwards clicking on this link, it provides support to me. Thank you!
Source: https://ahappystitch.com/2012/03/06/two-very-special-quilts-for-two-very-special-girls/
0 Response to "How to Make a Baby Quilt From Baby Clothes"
Postar um comentário